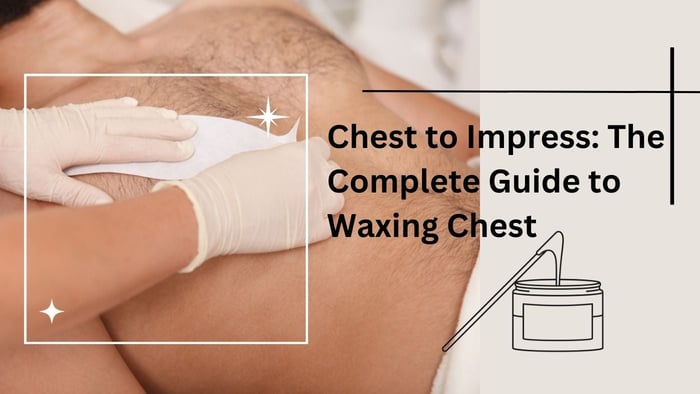

Let’s be real, chest hair is a divisive topic. For some it’s a badge of honor, a symbol of manhood. For others, it’s a prickly problem, a jungle that needs to be tamed.
You can navigate this hairy situation with confidence and style. Enter chest waxing. Whether you’re a beach bum looking for a smooth, sun-kissed look, a fitness enthusiast after a chiseled physique, or just someone looking to shake up your grooming routine, this is your guide to a hair-free haven.
We’ll get into the world of waxing, from the process to at-home maintenance. So, get ready to ditch the jungle and go smoothly.
Why Wax Your Chest?
Sick of the constant battle with chest hair? Waxing might be your hero. Shaving leads to stubble and irritation, and waxing removes hair from the root for a longer-lasting, smooth finish.
Imagine the confidence of a hair-free chest, perfect for those beach days or gym selfies. Plus, waxing can improve the appearance of your skin by exfoliating and removing dead skin cells, leaving it looking fresh and renewed.
Waxing might seem like a big step, but it’s actually a flexible option. If you have sensitive skin or ingrown hairs, shaving or depilatory creams will cause more irritation.
Waxing is a gentler option when done correctly. But everyone’s skin is different. If you have a low pain threshold or skin conditions, waxing might not be the best choice. In that case, laser hair removal might be a more long term solution.
Understanding Waxing Process
Waxing is a hair removal method where a sticky substance is applied to the skin and then pulled off to remove hair from the root. There are 3 types of wax: hard wax, soft wax, and strip wax.
Hard wax is applied directly to the skin and then hardened before being pulled off; soft wax needs a cloth strip to be removed, and strip wax is a type of soft wax that comes pre-applied to a strip.
The experience of waxing can vary depending on whether you do it in the salon or at home. A salon professional will typically clean the skin, apply the wax in the direction of hair growth, and then pull it off against the hair growth. While it can be painful, the results are often smoother and longer lasting than shaving.
If you’re brave enough to wax at home, make sure to follow the instructions. Pain management is a big concern. To minimize the discomfort, exfoliate the skin before, take over-the-counter pain relievers about an hour before waxing, and apply a cold compress to the area after.
Remember, everyone’s pain tolerance is different, and what works for one person might not work for another.
Getting Ready for Wax
Proper preparation is key to a good and comfortable waxing experience. Having your skin in good condition and hair at the right length will not only give you better results but also minimize discomfort. Let’s get your chest ready for its close-up
Hair Length
The ideal hair length for waxing is 1/4 to 1/2 inch. Hair that’s too short won’t be caught by the wax, and hair that’s too long can be more painful to remove.
Exfoliation
Exfoliate the skin a day or two before waxing to remove dead skin cells, prevent ingrown hairs and for the wax to adhere better to the hair.
Skin Care
Don’t use harsh soaps, lotions or perfumes on the area to be waxed on the day of the appointment. These can irritate the skin or interfere with the wax.
Clothing
Wear loose clothing to your waxing appointment. Tight clothing can irritate the skin after waxing.
At-Home Waxing: A DIY Guide
Taking the plunge and waxing at home can save you money and give you the convenience of grooming on your own time. But it requires some prep and execution. Let’s get started.
Essentials
Before you start your at-home waxing session make sure you have all the goods. You’ll need wax for body hair, hard or soft wax. Wax applicators or spatulas will be needed to apply the wax evenly.
If you’re using soft wax you’ll also need wax strips for removal. A pre-wax cleanser is helpful to prep the skin, and a post-wax soothing lotion to calm the skin afterward. Talcum powder can be used to reduce stickiness and help the wax adhere better.
Step-by-Step Process
Let’s break it down step by step for a smooth and successful waxing session.
- Prep the skin: Cleanse the area to remove oils and dirt. Lightly powder to reduce stickiness.
- Heat the wax: Follow the wax instructions for proper heating. Test on a small area to make sure it’s not too hot.
- Apply the wax: Using the applicator, apply a thin, even layer of wax in the direction of hair growth.
- Remove the wax: For hard wax, let it cool and harden before peeling off. For soft wax, press the strip firmly over the wax and pull it off quickly in the opposite direction of hair growth.
- Soothe the skin: Apply a post-wax lotion.
Troubleshooting
Here are some problems that occur after waxing with their solutions:
Safety Tips
Safety first when waxing at home. Let’s go over some common issues and how to fix them.
- Test the wax temperature: Before applying wax to a larger area, test it on a small patch of skin to make sure it’s not too hot. Burns can happen if the wax is too hot.
- Don’t wax over sensitive areas: Never wax over cuts, sores or irritated skin. Waxing can irritate these areas more and increase the risk of infection.
- Proper removal technique: To minimize discomfort, pull the wax strip quickly and in the opposite direction of hair growth. This will give a cleaner removal and reduce skin irritation.
Remember, consistency is key. Regular waxing can lead to finer, sparser hair growth over time.
Post Wax Care
Aftercare is key to maintaining your smooth results and comfort. Follow a gentle skincare routine and protect your skin from the sun, and you’ll enjoy longer irritation-free results.
Immediately after waxing, your skin is sensitive. Use gentle cleansers and moisturizers to calm the area. Avoid harsh scrubs or products with alcohol. To prevent ingrown hairs, exfoliate regularly with a gentle scrub.
Sun exposure can irritate newly waxed skin, so make sure to apply sunscreen with high SPF. If you notice any signs of infection, such as redness, swelling, or pus, seek medical advice ASAP.
Remember, time is on your side. Your skin will recover, and with proper care, you’ll enjoy your smooth chest for longer.
How to Keep Your Chest Smooth?
To keep your desired results you need to understand your hair growth cycle. Results may vary, but most people find that waxing every 4-6 weeks is best. Consistent waxing can lead to finer, sparser hair growth over time.
Exfoliation and skincare are key to prolonging your smooth results. Exfoliation prevents ingrown hairs, and moisturizing keeps your skin hydrated and healthy.
If you switch between waxing and other hair removal methods be aware it may affect your hair growth cycle. Consistency is best.
Waxing vs. IPL: Which is Good for You?
Waxing gives instant results but is a temporary solution that needs to be done again and again. IPL (Intense Pulsed Light) targets the hair follicle for long term hair reduction.
Devices like the INIA HAUTE and INIA FOND IPL Hair Removal Devices offer a convenient at-home alternative to salon treatments. Equipped with advanced features, they provide effective and safe hair removal.
With adjustable energy levels, you can customize the treatment to your skin sensitivity, while the large treatment window ensures quicker sessions. These devices often include additional features like skin tone sensors and cordless designs for added comfort and convenience.
IPL is less painful than waxing and can be used on any body area. However, note that IPL devices may need multiple sessions for optimal results and is not suitable for everyone. Ultimately, it’s up to you, your skin type, and your hair characteristics.
Summary
Waxing your chest will change your grooming routine, for a smooth hair free look that’s confident and stylish. It does require some effort and care, but the results are worth it – long-term smoothness and a sense of self.
Remember, whether you choose to wax regularly or try other methods, consistent care, and proper technique are key to maintaining those results. Ready to upgrade to a more convenient and long term solution? Try the INIA HAUTE IPL Hair Removal Device.
INIA HAUTE IPL Hair Removal Device
$119.99
Hair Root Elimination Salon smooth skin in 4 weeks. Our advanced IPL technology penetrates deep to permanently damage hair follicles for lasting smoothness. Experience up to 86.6% hair reduction after 12 weekly sessions. The ultimate at-home alternative to expensive laser… More Information
$269.99
With its advanced technology, it provides an effective, at-home alternative for achieving smooth, hair-free skin with less hassle.