Talking about arm hair, a topic that’s often swept under the rug, pun intended. For some, it’s a non-issue, just a part of being human. For others, it’s a source of anxiety.
The beauty industry has a lot to say about it, and societal norms can weigh in. But guess what? You get to decide what to do with your arms.
This article isn’t about telling you what’s right or wrong. It’s about giving you the information and confidence to make the best choice for you. Whether you’re considering waxing for the first time or you’re a pro looking to hone your skills, we’ve got you covered.
Understanding Arm Hair: It’s All Natural
Your arm hair is actually pretty awesome. It’s part of your body’s natural defense system, protecting your skin from the elements. And it helps regulate your body temperature. So next time you look at your arm, give it a pat on the back for being a hard working little hair.
But we know what you’re thinking. Genetics play a big role in how much arm hair you grow. If your parents are hairy, you’re probably hairy too. Hormones also have a say in the matter, especially during puberty. And as you age your hair growth patterns may change.
Let’s debunk some myths while we’re at it. That old wives’ tale about shaving making hair grow back thicker? Nope, not true. The hair itself doesn’t change; it just looks thicker when it grows back because the tip is blunt, not tapered.
Waxing Basics: Let’s Get Started
Before you start waxing, you need to know the different types of wax, get the right equipment, and prep your skin. This is the foundation for a smoother and better experience.
There are three types of wax: hard wax, soft wax, and strip wax. Hard wax is unique in that it hardens on the skin and can be removed without a strip. It’s gentler and suitable for sensitive areas.
Soft wax requires a cloth strip for removal and is often used for larger areas, but it can be more painful. For a quick and easy option, strip wax comes pre-waxed and ready to use, perfect for beginners or small touch-ups.
Waxing Equipment and Supplies
To get started with waxing, you will need a few things. A wax heater is essential to melt the wax to the right temperature. Spatulas are used to apply the wax evenly. Of course, you will need the wax itself, hard, soft, or strip wax, depending on your preference and skin type.
Cloth strips are needed for soft wax. And don’t forget pre and post-wax products. A cleanser prepares the skin, a toner balances it, and a soothing lotion calms the skin after waxing.
Preparing the Skin
Proper skin prep is crucial for a good wax. Exfoliation and cleansing are the key steps to get your skin ready.
- Exfoliation: Removes dead skin cells and prevents ingrown hairs. Use a gentle scrub 2-3 days before waxing.
- Cleansing: Clean the surface for better wax adhesion. Use a mild cleanser before waxing.
The Waxing Process
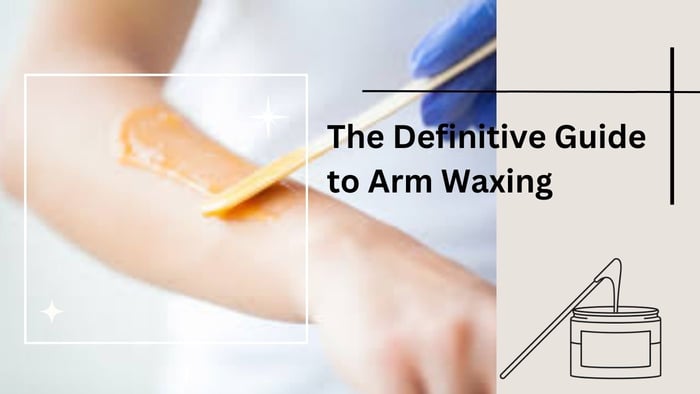
Waxing can be scary, but with the right steps, it’s a piece of cake. First, prep the area by cleansing and making sure the skin is dry. Then apply a thin layer of wax in the direction of hair growth.
For hard wax, let it harden, then peel off in the opposite direction. For soft wax use a cloth strip to remove. After waxing, apply aloe vera gel or lotion to soothe the skin.
Key Steps
- Preparation: Cleanse skin and hair should be the right length.
- Application: Apply wax evenly in the direction of hair growth.
- Removal: Peel off hard wax or use a cloth strip for soft wax against hair growth.
- Aftercare: Apply lotion, no tight clothing, and no hot baths.
To get the best results, remember to hold the skin taut as you apply the wax. This will minimize the discomfort and get a cleaner removal.
Also, the wax temperature is important; it should be hot enough to remove hair but not hot enough to burn the skin. For stubborn hair, don’t hesitate to go over the same area multiple times for complete hair removal.
Mistakes to Avoid
Don’t pull the skin during waxing; it can cause bruising and irritation. Wait until your hair grows at least 1/4 inch before waxing for best results. And don’t neglect aftercare, and it’s essential to prevent ingrown hairs and soothe the skin
Aftercare is key to smooth skin and no irritation. Immediately after waxing, apply aloe vera gel or a gentle moisturizer. A few days later, exfoliate gently to prevent ingrown hairs. And don’t wear tight clothes, take hot baths and don’t go out in the sun.
Waxing for Different Skin Types and Skin Conditions
Knowing your skin type is key to a good waxing experience. Different skin types require different care and wax types to minimize irritation.
- Sensitive Skin: Go for hard wax; it adheres to the hair not the skin, less discomfort. After waxing, apply aloe vera or gentle moisturizer.
- Dry Skin: To prevent dryness, use a cream-based wax with moisturizing ingredients. Exfoliate gently for a few days before waxing to remove dead skin cells.
- Oily Skin: Hard wax is often preferred for oily skin as it adheres better to the hair. Use a talc-based powder to absorb excess oil before waxing.
If you have eczema or psoriasis, consult a dermatologist before waxing, as it can irritate the skin. Ingrown hairs can be prevented with exfoliation and aftercare, but if it persists, look for alternative methods. Always patch-test new waxes, especially for sensitive skin.
Waxing Alternatives and Comparisons
Waxing isn’t the only option. Let’s see what else is out there.
Shaving vs Waxing
Shaving is quick and painless but temporary, with hair growth leading to stubble. Waxing is more time-consuming but longer lasting as it removes hair from the root. But it’s more painful.
Laser Hair Removal and Electrolysis
For long-term hair reduction, consider laser hair removal or electrolysis. Laser hair removal uses light to target hair follicles; electrolysis uses electric current to destroy individual hair follicles. Both require multiple sessions and can be expensive.
Choosing What’s Right for You?
The best hair removal method depends on your pain tolerance, time commitment, budget, and results. If you want a balance of cost and effectiveness at home, IPL devices like the INIA FOND and INIA HAUTE IPL removal devices might be the way to go. These devices offer several features, like double pulse technology, for efficient and safe hair removal.
The INIA HAUTE, for example, boasts double pulse technology for faster results, five adjustable energy levels to suit different skin sensitivities, a large treatment window for quicker sessions, a skin tone sensor for safety, and a cordless design for convenience.
Try out different methods, and you’ll find what’s right for you.
Conclusion
Now you have everything you need to go arm waxing like a pro. Whether you’re using traditional wax or trying new methods, knowing the ins and outs of different techniques and aftercare will get you the smooth, hair-free arms you want.
For a longer-term solution with less maintenance, consider the advanced benefits of IPL technology. The INIA HAUTE IPL Hair Removal Device and the INIA FOND IPL Hair Removal Device are a modern, convenient alternative to traditional waxing, targeting hair follicles for long-lasting results.
$119.99
Hair Root Elimination Salon smooth skin in 4 weeks. Our advanced IPL technology penetrates deep to permanently damage hair follicles for lasting smoothness. Experience up to 86.6% hair reduction after 12 weekly sessions. The ultimate at-home alternative to expensive laser… More InformationINIA HAUTE IPL Hair Removal Device

$269.99


